A Complete Tutorial on Refinishing Travertine Floors
Seaside Stone Restoration, we take pride in our commitment to using eco-friendly materials and sustainable practices to deliver exceptional service while safeguarding both our clients and the environment. Equipped with cutting-edge machinery and driven by a meticulous eye for detail, we ensure that every project reflects our dedication to quality and client satisfaction. Our passion for preserving natural beauty through safe, innovative methods sets us apart, making Seaside Stone Restoration the trusted choice for those who value both excellence and environmental responsibility.
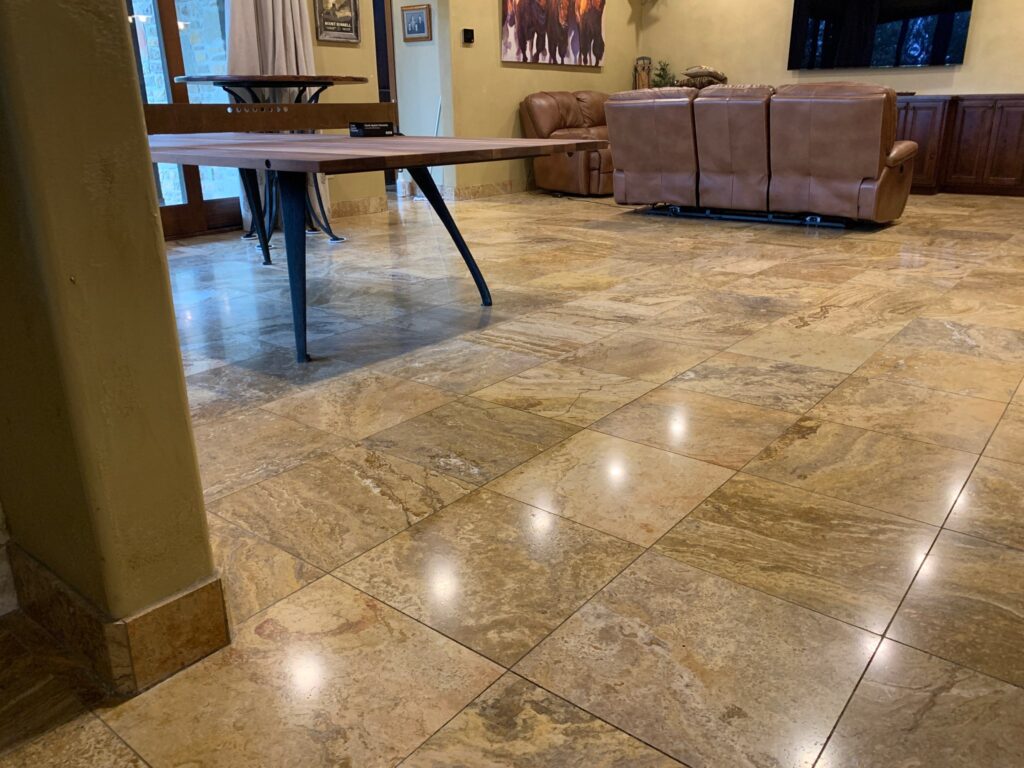
Travertine floors bring timeless beauty and elegance to homes and businesses. However, as durable as travertine is, it isn’t immune to wear and tear. Over time, travertine floors can become scratched, stained, or dull, detracting from their natural beauty. The good news? You don’t need to replace your floors to restore their charm. Refinishing travertine floors can make them look as good as new, often at a fraction of the cost of replacement.
This step-by-step guide will help you understand everything about refinishing travertine floors, from assessing their condition to polishing and sealing them for long-term protection. Let’s dive in.
Understanding Travertine Floors
What is Travertine?
Travertine is a type of limestone formed by mineral deposits in natural hot springs. Its subtle color variations, unique patterns, and porous texture make it a popular choice for flooring. Common shades include beige, ivory, walnut, and gold, lending a luxurious and classic appeal to interiors.
Common Issues with Travertine Floors
Travertine floors, while beautiful, are porous, meaning they can absorb liquids and stain easily if not sealed. Over time, they are prone to the following:
Scratches: Everyday foot traffic can cause tiny scratches that dull the surface.
Stains: Spilled coffee, wine, or acidic substances can seep into the stone.
Etching: Contact with acidic substances like vinegar or lemon juice can cause surface damage.
Dullness: Lack of maintenance and wear can reduce the floor’s natural shine.
Understanding these common issues is crucial for properly refinishing and maintaining your travertine floors.
Step 1: Assess the Floor’s Condition
Before jumping into the refinishing process, you need to understand the current state of your travertine floors. This assessment will help determine whether you can refinish the floors yourself or if you need professional assistance.
How to Assess:
Inspect for Scratches and Cracks: Run your hand over the surface to feel for scratches or cracks. Minor scratches can be sanded out, but cracks may require filling.
Identify Stains: Are the stains superficial or deeply embedded in the stone? Light stains can usually be removed during refinishing, but deep stains might need advanced techniques like poultices.
Check for Uneven Surfaces: Look for areas where tiles may be uneven, often caused by settling over time. These can sometimes be leveled during sanding.
Shine Test: Examine the level of shine under light. Dull areas indicate where polishing is needed.
Step 2: Gather the Necessary Tools and Materials
To refinish travertine floors, you’ll need specific tools and materials. Having everything ready before you begin will save time and ensure a smooth process.
Tools:
Diamond Polishing Pads: These come in various grits (low grit for sanding and high grit for polishing).
Wet/Dry Polishing Machine: Essential for sanding and polishing travertine evenly.
Hand Polisher (Optional): For smaller or hard-to-reach areas.
Putty Knife: To apply filler for cracks.
Wet/Dry Vacuum: For cleaning up debris during the process.
Materials:
pH-Neutral Stone Cleaner: Safe for cleaning travertine without damaging it.
Stone Filler: For repairing cracks and holes.
Polishing Powder: Enhances the natural shine of travertine.
Sealer: Protects the stone from stains and water absorption.
Protective Gear:
- Gloves, goggles, and a mask to protect yourself from dust and chemicals.
Step 3: Prepare the Area
Preparation is critical to ensure a smooth refinishing process. Follow these steps:
Clear the Space: Remove all furniture, rugs, and decorations from the room. This prevents damage to your belongings and gives you full access to the floor.
Thoroughly Clean the Floor: Use a pH-neutral cleaner and a mop to remove dirt, grime, and grease. Avoid harsh or acidic cleaners as they can damage the stone.
Dry the Floor Completely: Moisture can interfere with the sanding and polishing process. Use a microfiber cloth or leave the floor to air-dry overnight.
Protect Baseboards and Walls: Use painter’s tape to cover the edges of baseboards and adjacent surfaces. This prevents accidental damage from tools or materials.
Step 4: Repair Cracks and Holes
If your travertine floor has visible cracks or holes, address them before moving forward. Unattended damage can worsen over time and ruin the refinishing process.
Steps to Repair:
Choose a Matching Filler: Select a stone filler that closely matches the color of your travertine.
Apply the Filler: Use a putty knife to press the filler into the cracks or holes. Spread it evenly to avoid lumps.
Let it Cure: Follow the filler manufacturer’s instructions for drying time, usually around 24 hours.
Smooth the Surface: Once dry, sand the repaired area lightly to ensure it’s level with the rest of the floor.
Step 5: Sanding the Floor
Sanding removes scratches, stains, and unevenness, creating a smooth base for polishing.
Detailed Steps for Sanding:
Start with a Low-Grit Pad: Attach a 100-grit diamond pad to your polishing machine. Work in small sections, moving the machine in circular motions.
Progress to Higher Grits: Gradually switch to 200, 400, and 800-grit pads to refine the surface.
Keep the Floor Wet: Add water to the surface during sanding to minimize dust and prevent heat buildup.
Inspect Your Work: After each grit, clean the floor and check for remaining scratches or uneven spots. Repeat sanding as needed.
Step 6: Polishing the Floor
Polishing brings back the floor’s natural shine and smooth texture.
Polishing Process:
Apply Polishing Powder: Sprinkle a small amount of polishing powder designed for natural stone.
Buff the Floor: Use a buffing machine with a high-grit pad (1500-3000 grit) to polish the floor. Move slowly and consistently across the surface.
Clean Residue: Wipe away leftover powder with a damp microfiber cloth.
Step 7: Sealing the Floor
Sealing is the final and most crucial step to protect your travertine floors.
How to Seal:
Choose the Right Sealer: Use a penetrating sealer formulated for travertine.
Apply Evenly: Use a paint roller, sponge, or sprayer for uniform application.
Wipe Off Excess: After 10-15 minutes, wipe away any excess sealer with a clean cloth to prevent streaks.
Let it Cure: Allow the sealer to cure for at least 24 hours before walking on the floor.
Step 8: Maintenance After Refinishing
Refinished travertine floors need consistent care to maintain their beauty.
Tips for Maintenance:
Daily Cleaning: Sweep or vacuum regularly to remove dust and dirt.
Weekly Cleaning: Mop with a pH-neutral cleaner to keep the surface spotless.
Periodic Sealing: Reapply sealer every 1-2 years, depending on usage.
Avoid Harsh Products: Never use vinegar, bleach, or abrasive cleaners.
Conclusion
Refinishing travertine floors can transform a dull, scratched surface into a gleaming, polished masterpiece. By following this detailed tutorial, you can restore your travertine floors’ beauty and durability. Whether you’re doing it yourself or hiring a professional, refinishing is an investment that pays off in the form of stunning, long-lasting floors.
Take pride in your refinished travertine floors and enjoy their timeless elegance for years to come!


